Download and install skins via the BluePanel: Unterschied zwischen den Versionen
(Die Seite wurde neu angelegt: „{|width="40%" |Bild:deutsch.png - in Deutsch |Bild:english.png - [[Download and install skins via…“) |
|||
| Zeile 51: | Zeile 51: | ||
Now the skin needs to be activates: <BR> | Now the skin needs to be activates: <BR> | ||
<BR> | <BR> | ||
| − | [[ | + | [[Change and activate skins via the BluePanel]] <BR> |
<BR> | <BR> | ||
<BR> | <BR> | ||
--- | --- | ||
Aktuelle Version vom 22. September 2013, 10:42 Uhr
First of all, open the BluePanel with the blue button of
the remote control of the DreamBox.
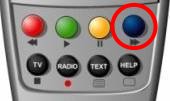
Following menu is displayes
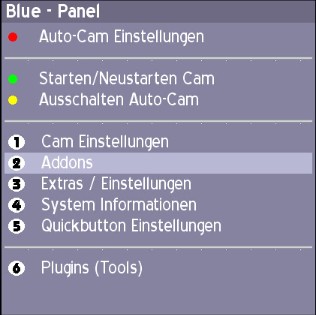
In the menu select the option [Addons] and confirm with the [OK] button.
Following submenu is opened:
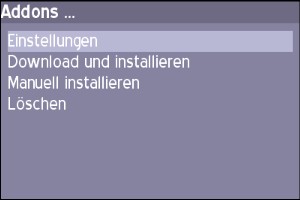
Select "Download and install".
An other menu appears with the different categories.
Select the entry "Skins"
confirm with [OK]

In this menu, all available skins are listed.
In this example we select the "Neutrino Style II Skin".
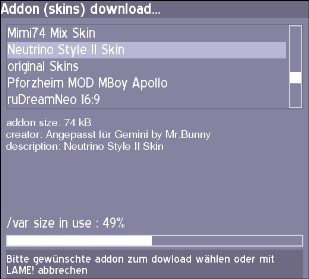
By pushing the [OK] button, the skin is downloaded and the question for installing the skin is displayes
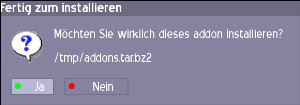
Confirm with the green button to install the skin.
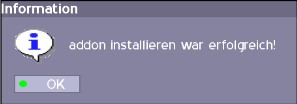
The skin is now installed.
By pushing "green", the skin list appears again, and additional skins can be installed.
Or exit the BluePanel.
Now the skin needs to be activates:
Change and activate skins via the BluePanel
---