GP3 weather (en): Unterschied zwischen den Versionen
| Zeile 93: | Zeile 93: | ||
Back to [[#top | table of contents]] | Back to [[#top | table of contents]] | ||
| − | == | + | == Sensor fields == |
[[Bild:GP3 Wetter Sensorfelder.png|thumb|none|Infobar - Temperatur Anzeige|800px]] | [[Bild:GP3 Wetter Sensorfelder.png|thumb|none|Infobar - Temperatur Anzeige|800px]] | ||
| − | + | With a GP3 Skins, it's possible to show weather information in the infobar. Change the sensor field settings in the BluePanel => Settings. Following settings are possible: | |
| − | * | + | * Weather (actual) - shows the actual temperature |
| − | * | + | * Weather (today) - shows the min. / max. temperature of the actual day |
| − | * | + | * Weather (tomorrow) - shows the min. / max. temperature of tomorrow |
Version vom 23. September 2012, 22:25 Uhr
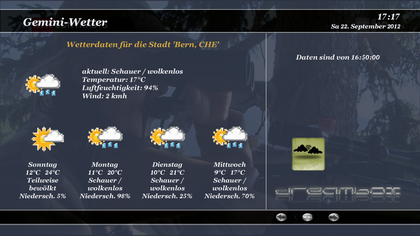
InhaltsverzeichnisThe geminiweather Plugin shows the weather forecast, based on the data of msn. Bedides the weather data of the actual daythe forecast of the following four days are displayed. It's possible to see the forecast of different configured cities. Also using alternative Weather Icons is possible. Weather PluginInstallationInstall the Weather Plugin (geminiweather) via [Addons] in the BluePanel. After a Enigma2 restart, you find the Weather Plugin in the BluePanel. It's also possible to install the plugin over the command line: opkg update && opkg install geminiweather
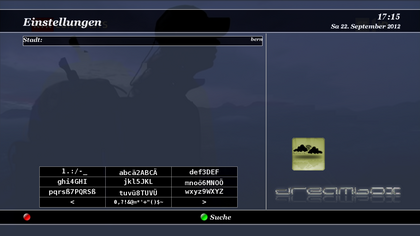
Configure Weather PluginUse the [Menü] button after starting the plugin to configure the weather forecast. The following list explains the possibilities.
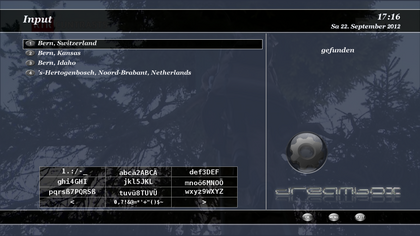
Depending on the entered data you will get a list of cities. Choose the desired city and press the [OK] button. The weather forecast will be shown.
Configure multiple citiesAdditional cities can be added. Use the [Menu] button again and add an new city as described in the previous cahpter. The weather forecasts of the different cities can be selected with the left, right button of the remote. The following list shows the new settings.
Activate Plugin IconsIn the Weather Plugin a package with alternative icons for the msn images is included. These can be activated with [Menu] and [Use Plugin Icons] set on Yes.
Sensor fieldsWith a GP3 Skins, it's possible to show weather information in the infobar. Change the sensor field settings in the BluePanel => Settings. Following settings are possible:
Andere Wetter IconsWenn ihr andere Wetter Icons benutzen wollt, müsst ihr sie im Gemini-Cache in den Ordner weather kopieren. Der GP3-Cache befindet sich in folgendem Verzeichnis: /home/root/.geminicache Die Bilder müssen im gif Format sein. 8 bit png's werden auch unterstützt. Die Dateiendung muss aber in gif umbenannt werden, damit sie dargestellt werden. Anschliessend müsst ihr noch die Einstellung [Plugin-Icons] auf nein ändern. Beispiele von verschiedenen Wetter Icons, sind in den folgenden Bildern ersichtlich. Back to overview: Gemini-Wiki:English Portal or Mainpage |


