Change and activate skins via the BluePanel: Unterschied zwischen den Versionen
Zur Navigation springen
Zur Suche springen
Mfgeg (Diskussion | Beiträge) |
|||
| Zeile 3: | Zeile 3: | ||
|[[Bild:english.png]] - [[Change and activate skins via the BluePanel|in English]] | |[[Bild:english.png]] - [[Change and activate skins via the BluePanel|in English]] | ||
|} | |} | ||
| − | |||
| − | |||
| − | |||
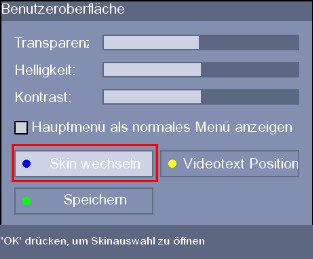
Open the main menu with the Menu button. And select:<BR> | Open the main menu with the Menu button. And select:<BR> | ||
settings / System / User Interface / Change skin.<BR> | settings / System / User Interface / Change skin.<BR> | ||
| Zeile 22: | Zeile 19: | ||
<BR> | <BR> | ||
Enigma is restarted, and the new skin is active. <BR> | Enigma is restarted, and the new skin is active. <BR> | ||
| − | |||
| − | |||
| − | |||
| − | |||
| − | + | [[Kategorie:Enigma (en)]] | |
Aktuelle Version vom 22. September 2013, 12:18 Uhr
Open the main menu with the Menu button. And select:
settings / System / User Interface / Change skin.

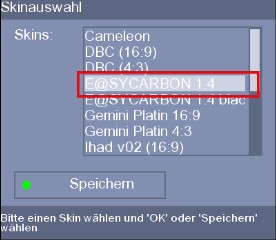
The skin selection is opened. Here you can select the desired skin. In the example
the E@sycarbon 1.4 skin is selected. Push the green button to select.

The box asks to restart Enigma. Confirm with the green button
or select [Yes].

Enigma is restarted, and the new skin is active.