OpenVPN GP4 (en): Unterschied zwischen den Versionen
| Zeile 4: | Zeile 4: | ||
|} | |} | ||
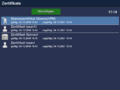
[[Datei:Openvpn GP4.png|right|thumb|400px|OpenVPN Zugriff von zwei Klients]] | [[Datei:Openvpn GP4.png|right|thumb|400px|OpenVPN Zugriff von zwei Klients]] | ||
| − | + | After the installation of the plugin, an easy configurable OpenVPN Server or Client is available. The OpenVPN uses certificates used for Servern-Multi-Client setups and an encrypted TLS connection. | |
| − | + | The OpenVPN Server can be configured for Bridge or Tunnel Mode. | |
| − | * | + | * In '''Bridge''' Mode the connected OpenVPN clients receive an IP address for the internal network. This enables the usage of all available services without additional Routing. |
| − | * | + | * In '''Tunnel''' Mode the client only has a connection to the OpenVPN Server of the Dreambox. |
== OpenVPN Server == | == OpenVPN Server == | ||
| − | + | Configure the OpenVPN Server as follows: | |
| − | === OpenVPN Server | + | === Configure OpenVPN Server === |
| − | # | + | # Start the OpenVPN Server plugin. |
| − | # | + | # Select the required Mode and the amount of clients with {{Taste|MENU}} → {{Taste|Settings}}. When using the Bridge Mode, an IP Range for the clients can be set. If the OpenVPN Server should be available after a reboot of the Dreambox, enable the setting '''Start Automatically'''. |
| − | === | + | === Create Certificates === |
| − | + | Open the certificate settings with the {{yellow|yellow}} button. Add with the {{green|green}} button the following certificates: | |
| − | # '''Root | + | # '''Root certificate'''. Define a password, validity period ... as wanted. |
| − | # '''Server | + | # '''Server certificate'''. Enter the previously defined password and the validity period. |
| − | # | + | # Finally the '''User certificate''' will be created. Enter the previously defined password and the validity period and a name for the client. |
| − | === OVPN | + | === Create OVPN Package for the client === |
| − | + | Open the certificate setting with the {{yellow|yellow}} button. Select the different clients and create the OpenVPN archives with the {{yellow|yellow}} button. The archive contain the configuration files and certificates, which will be needed to setup the clients. The zip archives are saved in: | |
<syntaxhighlight> | <syntaxhighlight> | ||
/etc/ssl/openvpn | /etc/ssl/openvpn | ||
</syntaxhighlight> | </syntaxhighlight> | ||
| − | === | + | === Start / Stop the OpenVPN Server === |
| − | + | Start the OpenVPN Server with the {{green|green}} button. {{red|red}} stops the OpenVPN Server. | |
| − | === | + | === Additional informations === |
| − | * | + | * Configuration files and certificates of the OpenVPN Server are saved in <code>/etc/openvpn</code>. |
| − | * | + | * When the OpenVPN Server is running, the menu {{Taste|Settings}} is not available. |
| − | * | + | * Connected clients will be visible after an interval of 60 seconds. |
| − | * | + | * Use the {{Taste|MENU}} button to display a log file. |
=== OpenVPN Server Screenshots === | === OpenVPN Server Screenshots === | ||
<gallery> | <gallery> | ||
| − | Datei:Openvpn GP4 Bridge.png|Bridge | + | Datei:Openvpn GP4 Bridge.png|Bridge Settings |
| − | Datei:Openvpn GP4 Tunnel.png|Tunnel | + | Datei:Openvpn GP4 Tunnel.png|Tunnel Settings |
| − | Datei:Openvpn GP4 Stammzertifikat.png| | + | Datei:Openvpn GP4 Stammzertifikat.png|Create Root certificate |
| − | Datei:Openvpn GP4 Serverzertifikat.png|Server | + | Datei:Openvpn GP4 Serverzertifikat.png|Create Server certificate |
| − | Datei:Openvpn GP4 Klientzertifikat.png| | + | Datei:Openvpn GP4 Klientzertifikat.png|Crete client certificate |
| − | Datei:Openvpn GP4 Zertifikate.png| | + | Datei:Openvpn GP4 Zertifikate.png|certificate overview |
| − | Datei:Openvpn GP4 Konfigs erstellen.png| | + | Datei:Openvpn GP4 Konfigs erstellen.png|Create configurations / Block certificates |
</gallery> | </gallery> | ||
| − | == OpenVPN | + | == OpenVPN Client == |
| − | === OpenVPN | + | === OpenVPN Client Screenshots === |
| − | == | + | == Block certifikates == |
| − | + | Certificates can be blocked, to disable the connection from a client. Open the certificate settings with the {{yellow|yellow}} button and select the client you want to block. Disable the certificate with the {{red|red}} button. | |
[[Kategorie:GP4 (en)]] | [[Kategorie:GP4 (en)]] | ||
Version vom 7. Oktober 2018, 14:23 Uhr

After the installation of the plugin, an easy configurable OpenVPN Server or Client is available. The OpenVPN uses certificates used for Servern-Multi-Client setups and an encrypted TLS connection.
The OpenVPN Server can be configured for Bridge or Tunnel Mode.
- In Bridge Mode the connected OpenVPN clients receive an IP address for the internal network. This enables the usage of all available services without additional Routing.
- In Tunnel Mode the client only has a connection to the OpenVPN Server of the Dreambox.
Inhaltsverzeichnis
OpenVPN Server
Configure the OpenVPN Server as follows:
Configure OpenVPN Server
- Start the OpenVPN Server plugin.
- Select the required Mode and the amount of clients with MENU → Settings. When using the Bridge Mode, an IP Range for the clients can be set. If the OpenVPN Server should be available after a reboot of the Dreambox, enable the setting Start Automatically.
Create Certificates
Open the certificate settings with the yellow button. Add with the green button the following certificates:
- Root certificate. Define a password, validity period ... as wanted.
- Server certificate. Enter the previously defined password and the validity period.
- Finally the User certificate will be created. Enter the previously defined password and the validity period and a name for the client.
Create OVPN Package for the client
Open the certificate setting with the yellow button. Select the different clients and create the OpenVPN archives with the yellow button. The archive contain the configuration files and certificates, which will be needed to setup the clients. The zip archives are saved in:
/etc/ssl/openvpn
Start / Stop the OpenVPN Server
Start the OpenVPN Server with the green button. red stops the OpenVPN Server.
Additional informations
- Configuration files and certificates of the OpenVPN Server are saved in
/etc/openvpn. - When the OpenVPN Server is running, the menu Settings is not available.
- Connected clients will be visible after an interval of 60 seconds.
- Use the MENU button to display a log file.
OpenVPN Server Screenshots

Bridge Settings

Tunnel Settings

Create Root certificate

Create Server certificate

Crete client certificate
certificate overview

Create configurations / Block certificates


OpenVPN Client
OpenVPN Client Screenshots
Block certifikates
Certificates can be blocked, to disable the connection from a client. Open the certificate settings with the yellow button and select the client you want to block. Disable the certificate with the red button.