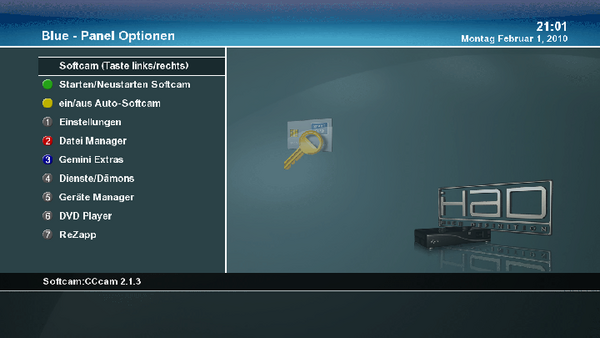
GP2 Blue Panel (en): Unterschied zwischen den Versionen
| (106 dazwischenliegende Versionen von 2 Benutzern werden nicht angezeigt) | |||
| Zeile 1: | Zeile 1: | ||
__NOTOC__ | __NOTOC__ | ||
| − | In this article you will find links for extended descriptions of the [[GP2 Blue Panel (en)]] desktop. The successor of this Blue Panel is the [[GP3 Blue Panel (en)]] desktop. | + | {|width="40%" |
| + | |[[Bild:deutsch.png]] - [[GP2 Blue Panel|in Deutsch]] | ||
| + | |[[Bild:english.png]] - [[GP2 Blue Panel (en)|in English]] | ||
| + | |} | ||
| + | In this article you will find links for extended descriptions of the [[GP2 Blue Panel (en)|GP2 Blue Panel]] desktop. The successor of this Blue Panel is the [[GP3 Blue Panel (en)|GP3 Blue Panel]] desktop. | ||
== GP2 Blue Panel Desktop (Basis Gemini 5.x) == | == GP2 Blue Panel Desktop (Basis Gemini 5.x) == | ||
| Zeile 12: | Zeile 16: | ||
*'''[[GP2 Blue Panel (en)#Auto-Cam activate / settings|on/off Auto Softcam]]''' - activate/deactivate the Auto Cam function | *'''[[GP2 Blue Panel (en)#Auto-Cam activate / settings|on/off Auto Softcam]]''' - activate/deactivate the Auto Cam function | ||
| − | *'''[[Blue | + | *'''[[GP2 Blue Panel (en)#Settings|Settings]]''' - Gemini Settings |
| − | *'''[[Blue | + | *'''[[GP2 Blue Panel (en)#File Browser|File Browser]]''' - the Gemini File Browser |
| − | *'''[[Blue | + | *'''[[GP2 Blue Panel (en)#Gemini Extras|Gemini Extras]]''' - Gemini Extras |
| − | *'''[[Blue | + | *'''[[GP2 Blue Panel (en)#Daemons|Services/Daemons]]''' - activate/deactivate Services/Daemons and settings |
| − | *'''[[Blue | + | *'''[[GP2 Blue Panel (en)#Device Manager|Device Manager]]''' - Settings and informations about devices connected to the Dreambox |
| − | *'''[[Blue | + | *'''[[GP2 Blue Panel (en)#DVD Player|DVD Player]]''' - DVD Player for DVDs and ISO Files |
| − | *'''[[Blue | + | *'''[[GP2 Blue Panel (en)#ReZapp|ReZapp]]''' - ReZapp zapp back to the selected channel |
|- | |- | ||
| | | | ||
| Zeile 34: | Zeile 38: | ||
|- class="hintergrundfarbe5" | |- class="hintergrundfarbe5" | ||
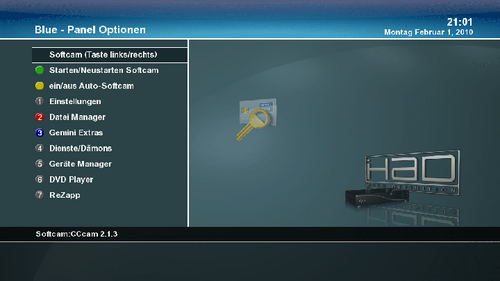
| [[Bild:BluePanel-enigma2-Gemini.png|left|thumb|500px|]] || The cursor is on the menu entry: | | [[Bild:BluePanel-enigma2-Gemini.png|left|thumb|500px|]] || The cursor is on the menu entry: | ||
| − | + | Select Camd with the {{Taste|←}} {{Taste|→}} buttons. | |
Here you can select the installed Cams.<br/> | Here you can select the installed Cams.<br/> | ||
In the upper part, the name of the selected Camd is displayed.<br/> | In the upper part, the name of the selected Camd is displayed.<br/> | ||
| Zeile 40: | Zeile 44: | ||
It's also possible to activate the different installed Cams (Emus). | It's also possible to activate the different installed Cams (Emus). | ||
| − | With the | + | With the {{Green|green}} button the selected Cam is started or restarted (Camreset). |
|} | |} | ||
| Zeile 46: | Zeile 50: | ||
{| | {| | ||
|- class="hintergrundfarbe5" | |- class="hintergrundfarbe5" | ||
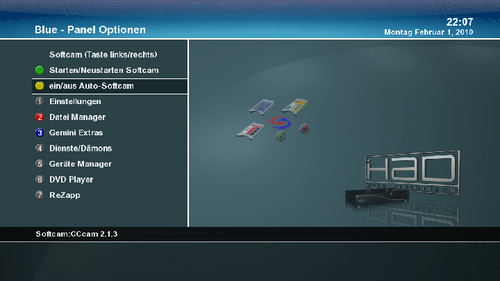
| − | Autocam | + | Autocam is used when different channels are using different Cams. The Cams will be started/stopped automatically. |
| − | | [[Bild:Autocamd-einschalten-enigma2-Gemini.png|left|thumb|500px|]] | + | | [[Bild:Autocamd-einschalten-enigma2-Gemini.png|left|thumb|500px|]]With the {{Yellow|yellow}} button you can activate the Autocam function.<br> |
| − | + | This works only when '''more as one Softcam was installed'''! | |
|- | |- | ||
|- | |- | ||
|- | |- | ||
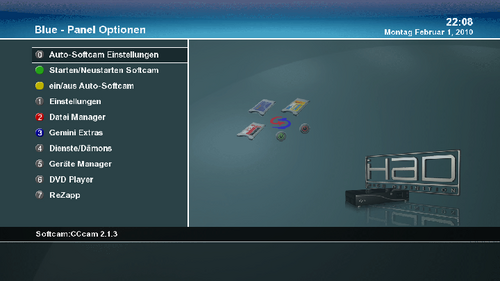
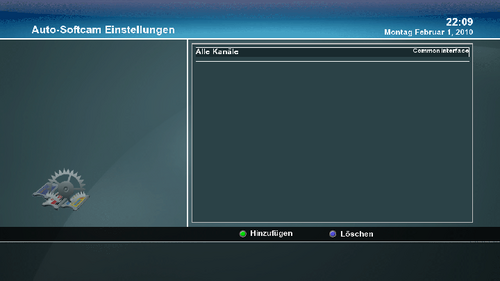
| − | | [[Bild:Autocamd-einschalten-enigma2-Gemini(2).png|left|thumb|500px|Autocam | + | | [[Bild:Autocamd-einschalten-enigma2-Gemini(2).png|left|thumb|500px|Activate Autocam]]After activating the Autocam function with the {{Yellow|yellow}} button of the remote control the menu appears. We continu with the Autocam settings. |
|- | |- | ||
| − | | [[Bild:Autocamd-einstellungen-enigma2.png|left|thumb|500px|Autocam | + | | [[Bild:Autocamd-einstellungen-enigma2.png|left|thumb|500px|Autocam settings]]Here it is possible to assign a specific SoftCam for a channel.<br/><br/> If you want to add a new channel press the {{Green|green}} button.<br/><br/>Now it is possible to navigate through the different lists (provider/satellites) with the colored buttons.<br/><br/> Press {{Taste|OK}} to add the selected channel. |
|- | |- | ||
|} | |} | ||
| Zeile 61: | Zeile 65: | ||
{| | {| | ||
|- class="hintergrundfarbe5" | |- class="hintergrundfarbe5" | ||
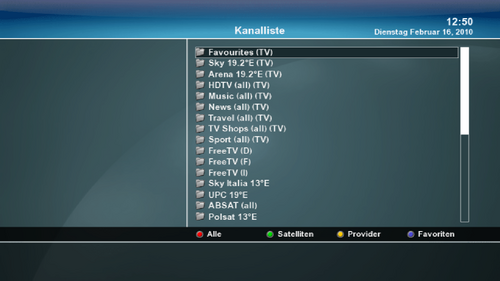
| − | | [[Bild:Autocamd-einstellungen01-enigma2.png|left|thumb|500px| | + | | [[Bild:Autocamd-einstellungen01-enigma2.png|left|thumb|500px|Add over the colored buttons]]Now you can: select a channel in the favoriten list with the colored buttons you can select satellites or providers to choose a channel. |
|- | |- | ||
|} | |} | ||
| Zeile 67: | Zeile 71: | ||
{| | {| | ||
|- class="hintergrundfarbe5" | |- class="hintergrundfarbe5" | ||
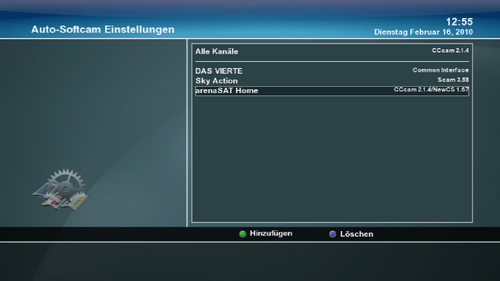
| − | | [[Bild:Autocamd-einstellungen02-enigma2.png|left|thumb|500px| | + | | [[Bild:Autocamd-einstellungen02-enigma2.png|left|thumb|500px|Adding over colored buttons]]Here you select the wanted channels, satellites or provider and assing a Softcam.<br/><br/> with the {{Blue|blue}} button you can delete an entry. |
|- | |- | ||
|} | |} | ||
| − | == | + | == Settings == |
{| | {| | ||
| Zeile 77: | Zeile 81: | ||
| [[Bild:Einstellungen-Enigma2-Gemini.png|left|thumb|500px|]] || | | [[Bild:Einstellungen-Enigma2-Gemini.png|left|thumb|500px|]] || | ||
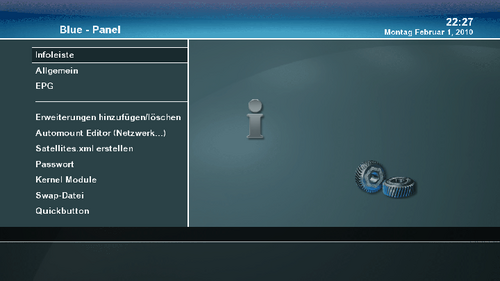
| − | *'''[[Blue | + | *'''[[GP2 Blue Panel (en)#Infobar|Infobar]]''' - Settings for the Infobar |
| − | *'''[[Blue | + | *'''[[GP2 Blue Panel (en)#General|General]]''' - General settings |
| − | *'''[[Blue | + | *'''[[GP2 Blue Panel (en)#EPG Setup|EPG]]''' - Settings for the EPG |
| − | *'''[[Blue | + | *'''[[GP2 Blue Panel (en)#Install/Remove addons|Install/Remove addons]]''' - Install/Remove Gemini addons |
| − | *'''[[Blue | + | *'''[[GP2 Blue Panel (en)#Automount Editor (Network...)|Automount Editor]]''' - Settings for Automatic Mounting |
| − | *'''[[Blue | + | *'''[[GP2 Blue Panel (en)#Create satellites.xml|Create satellites.xml]]''' - Create actual transponder lists for Satellites |
| − | *'''[[Blue | + | *'''[[GP2 Blue Panel (en)#Password|Password]]''' - Change the Dreambox Password (FTP/SSH/Telnet/Webinterface) |
| − | *'''[[Blue | + | *'''[[GP2 Blue Panel (en)#Swap file|Swap file]]''' - Create/manage "Swap file" |
| − | *'''[[Blue | + | *'''[[GP2 Blue Panel (en)#Quickbutton|Quickbutton]]''' - Settings for Quickbuttons |
|- | |- | ||
|} | |} | ||
| − | + | == Infobar == | |
| − | == | ||
{| | {| | ||
| Zeile 104: | Zeile 107: | ||
| [[Bild:Infoleiste-Enigma2.png|left|thumb|500px|]] || | | [[Bild:Infoleiste-Enigma2.png|left|thumb|500px|]] || | ||
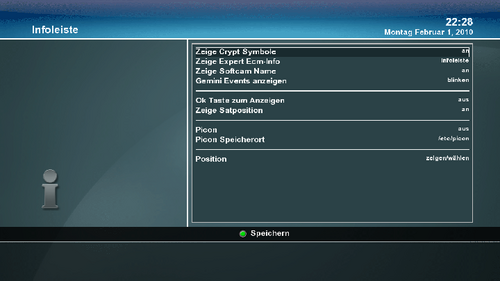
| − | *''' | + | *'''Show Crypt symbol''' - Show the encryption symbol in the Infobar - on/off |
| − | *'''Expert ECM | + | *'''Expert ECM Info''' - ECM timings, encryption (CAID) - Infobar/window/off |
| − | *''' | + | *'''Show Softcam Name''' - on/off |
| − | *'''Gemini Events | + | *'''Show Gemini Events''' - Mail, calender - on/off/blink |
| − | *'''OK | + | *'''OK button for show''' - Infobar will be displayed/hidden with the OK button - on/off |
| − | *''' | + | *'''Show Sat position''' - Orbital position of the Sat e.g. 19.2°E will be shown in the Infobar - on/off |
| − | *'''[[Picon]]''' - | + | *'''[[Picon]]''' - Show channel symbol in the Infobar - on/off |
| − | *'''Picon | + | *'''Picon path''' - Path of the used Picons |
| − | *'''Position''' - | + | *'''Position''' - set the position of the Infobar |
|- | |- | ||
|} | |} | ||
| − | + | == General == | |
| − | == | ||
{| | {| | ||
| Zeile 131: | Zeile 133: | ||
| [[Bild:E2_Allgemeine-Gemini.png|left|thumb|500px|]] || | | [[Bild:E2_Allgemeine-Gemini.png|left|thumb|500px|]] || | ||
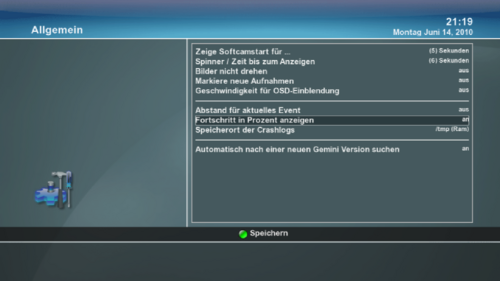
| − | *''' | + | *'''Show Softcam start for...''' - OSD message "Cam is started" |
| − | *'''Spinner / | + | *'''Spinner / time to show''' - Gears showed after x seconds |
| − | *''' | + | *'''Don't rotate images''' - Horizontal images will not be rotated when displayed - on/off |
| − | *''' | + | *'''Mark new recordings''' - New recordings are marked untill they are played the first time |
| − | *''' | + | *'''Speed OSD fading''' - OSD Fading (slow fading of the OSD) |
| − | *''' | + | *'''Distance for actual event''' |
| − | *''' | + | *'''Display progress in procent''' - shows the progress of an event as %, in the EPG and Infobar |
| − | *''' | + | *'''Save Crashlog''' - set the path for "bluescreens" - Attention: /tmp/ is flushed while rebooting!!! |
| − | *''' | + | *'''Check for new Gemini Version automaticcally''' - Show if a new Release is available. A "R" blinks in the Infobar when an update is available. Check is performed between 24:00 and 01:00. Is the Box switched off the check will be performed within 1 hour after booting |
|- | |- | ||
|} | |} | ||
| Zeile 157: | Zeile 159: | ||
| [[Bild:E2_egp-setup-Gemini.png|left|thumb|500px|]] || | | [[Bild:E2_egp-setup-Gemini.png|left|thumb|500px|]] || | ||
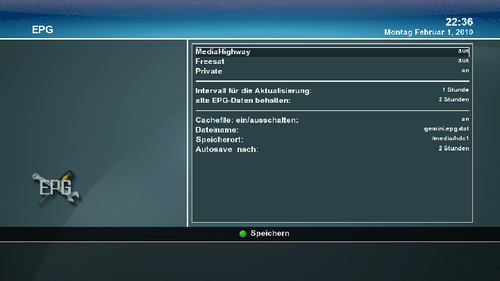
| − | *'''MediaHighway''' - EPG | + | *'''MediaHighway''' - EPG used by Canal+ and CanalDigitaal - on/off |
| − | *'''Freesat''' - EPG | + | *'''Freesat''' - EPG for the English Freesat package - on/off |
| − | *'''Private''' - Sky Deutschland Private EPG (EPG | + | *'''Private''' - Sky Deutschland Private EPG (EPG for subchannels) - on/off |
| − | *''' | + | *'''Interval for updating''' - Interval in which the EPG gets "refreshed" |
| − | *''' | + | *'''Keep old EPG''' - EPG "history" of the past (only possible in the Single EPG view) |
| − | *''' | + | *'''Cache file on/off''' - backup of the EPG data - on/off |
| − | *''' | + | *'''File name''' - File name of the EPG backup - name free to set |
| − | *''' | + | *'''Path''' - Path for the EPG backup |
| − | *'''Autosave | + | *'''Autosave after''' - timing for saving the EPG backup file |
|- | |- | ||
|} | |} | ||
| − | == | + | == Install/Remove addons == |
{| | {| | ||
|- class="hintergrundfarbe5" | |- class="hintergrundfarbe5" | ||
| [[Bild:Addons-Enigma2-Gemini.png|left|thumb|500px|]] || | | [[Bild:Addons-Enigma2-Gemini.png|left|thumb|500px|]] || | ||
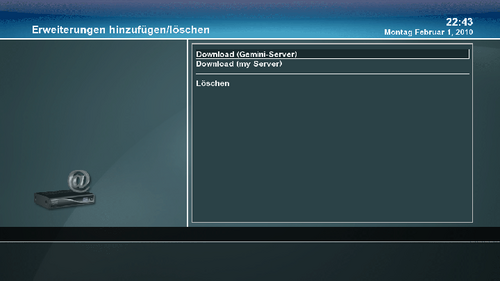
| − | *'''[[Blue | + | *'''[[GP2 Blue Panel (en)#Download (Gemini Server)|Download Gemini Server]]''' - Addons prepared by the IHAD-Team (only available with internet connection) |
| − | *'''[[Blue | + | *'''[[GP2 Blue Panel (en)#Download (My Server)|Download (My Server)]]''' - install your own Addons from your Addon Server configured in the useraddon.xml |
| − | *'''[[Blue | + | *'''[[GP2 Blue Panel (en)#Remove|Remove]]''' - remove installed Addons |
|- | |- | ||
|} | |} | ||
| Zeile 194: | Zeile 196: | ||
{| | {| | ||
|- class="hintergrundfarbe5" | |- class="hintergrundfarbe5" | ||
| − | | [[Bild:Download-Installieren-Enigma2.png|left|thumb|500px|]] || | + | | [[Bild:Download-Installieren-Enigma2.png|left|thumb|500px|]] || A part of the list offered by the Gemini Server. |
|- | |- | ||
|} | |} | ||
| Zeile 200: | Zeile 202: | ||
=== Download (My Server) === | === Download (My Server) === | ||
| − | + | Here you have access to an extra server, if you have configured the server yourself. | |
| − | + | This is an interface for users who want to install other Addons as offered by the Gemini Server over the BluePanel. | |
| − | + | Therefore you need to configure the '''useraddon.xml''' to connect toy your own server. The '''useraddon.xml''' can be found in '''/etc'''. | |
| − | + | === Remove === | |
| − | |||
| − | === | ||
{| | {| | ||
|- class="hintergrundfarbe5" | |- class="hintergrundfarbe5" | ||
| − | | [[Bild:Addons-Loeschen-Enigma2.png|left|thumb|500px|]] || | + | | [[Bild:Addons-Loeschen-Enigma2.png|left|thumb|500px|]] || Think twice before removing, once removed it is gone... |
|- | |- | ||
|} | |} | ||
| − | == Automount Editor ( | + | == Automount Editor (Network...) == |
{| | {| | ||
|- class="hintergrundfarbe5" | |- class="hintergrundfarbe5" | ||
| − | | [[Bild:Extras-automount.png|left|thumb|500px|]] || | + | | [[Bild:Extras-automount.png|left|thumb|500px|]] || this is how it looks if an entry exists in the '''/etc/auto.network'''. |
|- | |- | ||
|} | |} | ||
| Zeile 226: | Zeile 226: | ||
{| | {| | ||
|- class="hintergrundfarbe5" | |- class="hintergrundfarbe5" | ||
| − | | [[Bild:Extras-automount_edit.png|left|thumb|500px|]] || | + | | [[Bild:Extras-automount_edit.png|left|thumb|500px|]] || With the editor it is possible to add an entry with the remote control in the '''/etc/auto.network''', or to edit.<br><br><br> But it's easier to edit the '''"auto.network"''' directly in '''"/etc"''' with an editor. |
|- | |- | ||
|} | |} | ||
| − | == | + | == Create satellites.xml == |
{| | {| | ||
|- class="hintergrundfarbe5" | |- class="hintergrundfarbe5" | ||
|- valign="center" | |- valign="center" | ||
| − | | [[Bild:Satelliten-Enigma2.png|left|thumb|500px| | + | | [[Bild:Satelliten-Enigma2.png|left|thumb|500px|Selection of the satellite region]] || Here you can select the desired satellite region, for creating you new satellites.xml. |
|- | |- | ||
|} | |} | ||
| Zeile 243: | Zeile 243: | ||
|- class="hintergrundfarbe5" | |- class="hintergrundfarbe5" | ||
|- valign="center" | |- valign="center" | ||
| − | | [[Bild:Satelliten-Enigma2_auswahl.png|left|thumb|500px| | + | | [[Bild:Satelliten-Enigma2_auswahl.png|left|thumb|500px|Selection of the satellites]] || Here you can select the desired satellitsn you can receive.<br><br> With the cursor right/left you can switch the selection.<br><br>Once the seledction is made and saved with the green button, the menu for downloading appears (next image) |
|- | |- | ||
|} | |} | ||
| Zeile 252: | Zeile 252: | ||
|- class="hintergrundfarbe5" | |- class="hintergrundfarbe5" | ||
|-valign="center" | |-valign="center" | ||
| − | | [[Bild:Satelliten-Enigma2_menue-download.png|left|thumb|500px| | + | | [[Bild:Satelliten-Enigma2_menue-download.png|left|thumb|500px|Menu after savin the satellite selection]] || Here you can start the download over the blue button |
|- | |- | ||
|} | |} | ||
| Zeile 260: | Zeile 260: | ||
|- class="hintergrundfarbe5" | |- class="hintergrundfarbe5" | ||
|- valign="center" | |- valign="center" | ||
| − | | [[Bild:Satelliten-Enigma2_download.png|left|thumb|400px| | + | | [[Bild:Satelliten-Enigma2_download.png|left|thumb|400px|Question to confirm the download]] || |
| − | | [[Bild:Satelliten-Enigma2_download2.png|left|thumb|500px|Download | + | | [[Bild:Satelliten-Enigma2_download2.png|left|thumb|500px|Download and installation of the new satellites.xml]] |
|- | |- | ||
|} | |} | ||
| − | == | + | == Password == |
{| | {| | ||
|- class="hintergrundfarbe5" | |- class="hintergrundfarbe5" | ||
|-valign="center" | |-valign="center" | ||
| − | | [[Bild:Root-Passwort-Enigma2.png|left|thumb|500px| || | + | | [[Bild:Root-Passwort-Enigma2.png|left|thumb|500px| ||Here you can change the password for the superuser "root".]] It's also possible to change the password over telnet: [[Change Password (en)]] |
|- | |- | ||
|} | |} | ||
| − | == | + | == Swap file == |
{| | {| | ||
| Zeile 292: | Zeile 292: | ||
|} | |} | ||
| − | + | The Quickbutton is the green button on the remote control (in TV Mode). | |
| − | + | Standard only the Pluginbrowser is activated, you can add additional applications. If you have added applications a selection menu appears when pressing the green button. | |
| − | + | Informations how to add telnet commands or scripts can be found here: [[Quickbutton.xml]] | |
| + | == File Browser == | ||
| − | + | The '''File Browser''' is on of the '''most powerfull tools in Gemini'''. With this file browser you can navigate through the image, but it will also '''play media files''' , '''show text files''' and you can '''install manually all kind of Addons'''. | |
| − | + | And of course you can delete, rename ... files. | |
| − | |||
| − | |||
{| | {| | ||
| Zeile 308: | Zeile 307: | ||
| [[Bild:E2_Dateimanager-Gemini(1).png|left|thumb|500px|]] || [[Bild:E2_Dateimanager-Gemini(2).png|left|thumb|350px|]] | | [[Bild:E2_Dateimanager-Gemini(1).png|left|thumb|500px|]] || [[Bild:E2_Dateimanager-Gemini(2).png|left|thumb|350px|]] | ||
|- | |- | ||
| − | |[[Bild:E2_Dateimanager-Favoriten.png|left|thumb|500px| | + | |[[Bild:E2_Dateimanager-Favoriten.png|left|thumb|500px|here you can add favorites]]|| |
| − | [[Bild:E2_Dateimanager-Textanzeige.png|left|thumb|350px| | + | [[Bild:E2_Dateimanager-Textanzeige.png|left|thumb|350px|show text in the file browser]] |
|- | |- | ||
| − | |[[Bild:E2_Dateimanager-Rechte.png|left|thumb|500px| | + | |[[Bild:E2_Dateimanager-Rechte.png|left|thumb|500px|The rights of the file can be changed with left/right]] |
|- | |- | ||
| − | |[[Bild:E2_Dateimanager-Symlink.png|left|thumb|500px| | + | |[[Bild:E2_Dateimanager-Symlink.png|left|thumb|500px|Create a [[Symlink]]]] |
|- | |- | ||
| − | |[[Bild:E2_Dateimanager-installieren.png|left|thumb|500px| | + | |[[Bild:E2_Dateimanager-installieren.png|left|thumb|500px|Manual installation of a Plugins with the file browser]] |
|- | |- | ||
|} | |} | ||
| Zeile 322: | Zeile 321: | ||
| − | + | The control central for most of the Gemini Addons, which are integrated in the Gemini Image. | |
{| | {| | ||
| Zeile 329: | Zeile 328: | ||
| [[Bild:E2_Gemini-Extras(1).png|left|thumb|500px|]] || | | [[Bild:E2_Gemini-Extras(1).png|left|thumb|500px|]] || | ||
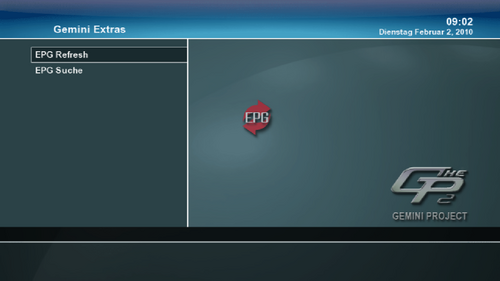
| − | *'''[[Blue | + | *'''[[GP2 Blue Panel (en)#Dreamnetcast / Streamripper|Dreamnetcast/Streamripper]]''' - Play/record Internet radio |
| − | *'''[[Blue | + | *'''[[GP2 Blue Panel (en)#Jukebox|Jukebox]]''' - Play Audio files (Playlists) |
| − | *'''[[Blue | + | *'''[[GP2 Blue Panel (en)#Weather|Weather]]''' - Weather prediction for the entire world |
| − | *'''[[Blue | + | *'''[[GP2 Blue Panel (en)#RSS Reader|RSS Reader]]''' - Read RSS feeds |
| − | *'''[[Blue | + | *'''[[GP2 Blue Panel (en)#eMail-Checker|eMail-Checker]]''' - Notification when a new email is in your inbox |
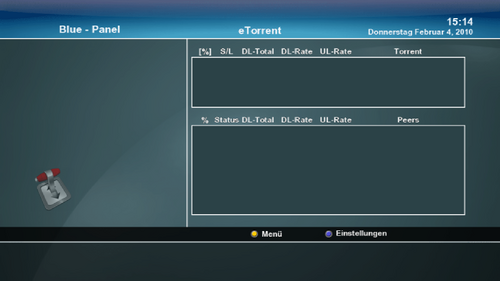
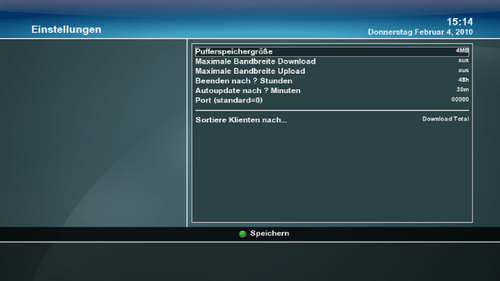
| − | *'''[[Blue | + | *'''[[GP2 Blue Panel (en)#eTorrent|eTorrent]]''' - Torrent client for downloading torrents directly on your Dreambox |
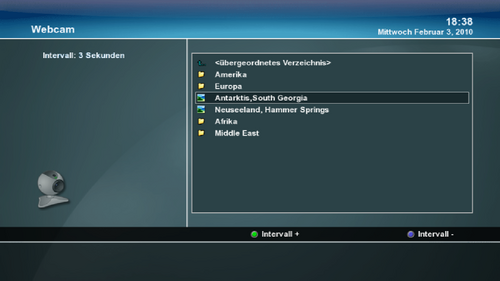
| − | *'''[[Blue | + | *'''[[GP2 Blue Panel (en)#Webcam Viewer|Webcam Viewer]]''' - View Webcams from the entire world |
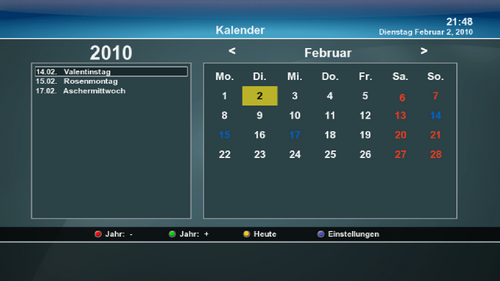
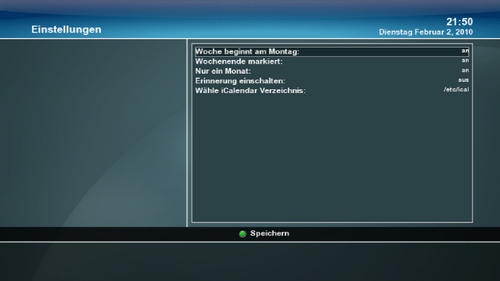
| − | *'''[[Blue | + | *'''[[GP2 Blue Panel (en)#Calendar|Calendar]]''' - an integrated calendar for Gemini |
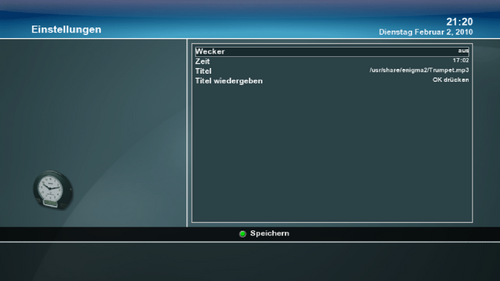
| − | *'''[[Blue | + | *'''[[GP2 Blue Panel (en)#Alarm clock|Alarm clock]]''' - an integrated alarm clock |
|- | |- | ||
| [[Bild:E2_Gemini-Extras(2).png|left|thumb|500px|]] || | | [[Bild:E2_Gemini-Extras(2).png|left|thumb|500px|]] || | ||
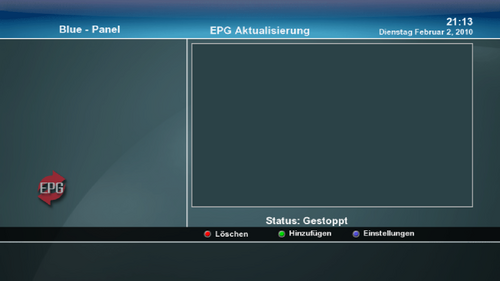
| − | *'''[[Blue | + | *'''[[GP2 Blue Panel (en)#EPG Refresh|EPG Refresh]]''' - Update your EPG data easily at a set time |
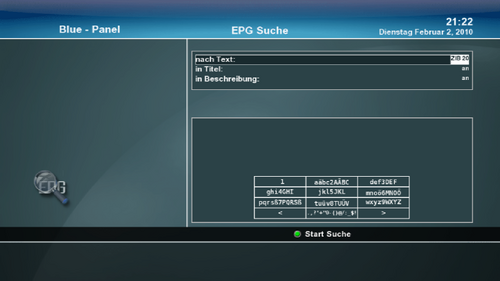
| − | *'''[[Blue | + | *'''[[GP2 Blue Panel (en)#EPG Search|EPG Search]]''' - Search the EPG for specific strings/events |
|- | |- | ||
|} | |} | ||
| Zeile 360: | Zeile 359: | ||
|- class="hintergrundfarbe5" | |- class="hintergrundfarbe5" | ||
|- valign="center" | |- valign="center" | ||
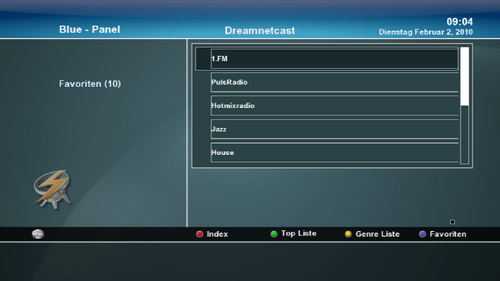
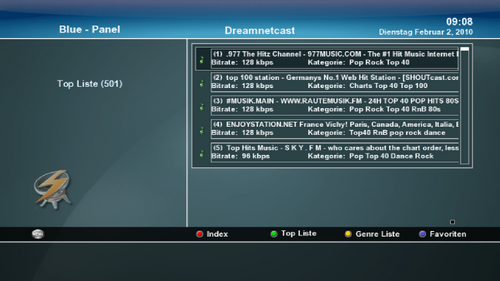
| − | | [[Bild:E2_Dreamnetcast_fav.png|left|thumb|500px| | + | | [[Bild:E2_Dreamnetcast_fav.png|left|thumb|500px|The Schoutcast Favorites]] || [[Bild:E2_Dreamnetcast-toplist.png|left|thumb|500px|The "most popular" Top List]] |
|- valign="bottom" | |- valign="bottom" | ||
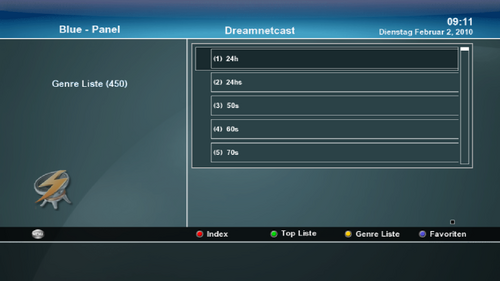
| − | | [[Bild:E2_Dreamnetcast-genrelist.png|left|thumb|500px| | + | | [[Bild:E2_Dreamnetcast-genrelist.png|left|thumb|500px|The "genre" Shoutcast list]] || [[Bild:E2_Dreamnetcast_detail.png|left|thumb|500px|you can change the sorting with the red button [Index] - [Bitrate] - [name]]] |
|} | |} | ||
| Zeile 381: | Zeile 380: | ||
|-class="hintergrundfarbe5" | |-class="hintergrundfarbe5" | ||
|-valign="top" | |-valign="top" | ||
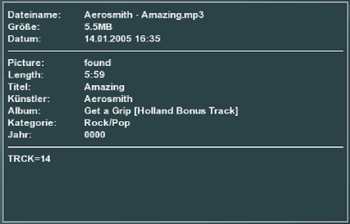
| − | |[[Bild:E2_Jukebox-leer.png|left|thumb|500px| | + | |[[Bild:E2_Jukebox-leer.png|left|thumb|500px|The Jukebox is the integraited Gemini Musicplayer]] || [[Bild:E2_Jukebox-info.png|left|thumb|350px|The Info button shows the details]] |
|- | |- | ||
| Zeile 390: | Zeile 389: | ||
|-class="hintergrundfarbe5" | |-class="hintergrundfarbe5" | ||
|-valign="top" | |-valign="top" | ||
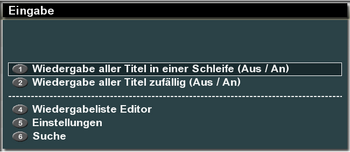
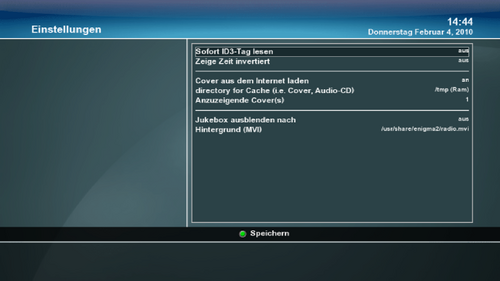
| − | | [[Bild:E2_Jukebox-menue.png|left|thumb|350px| | + | | [[Bild:E2_Jukebox-menue.png|left|thumb|350px|The menu button opens this selection]] || [[Bild:E2_Jukebox-Einstellungen.png|left|thumb|500px|]] |
|- | |- | ||
|} | |} | ||
| − | |||
| − | |||
| − | |||
| − | |||
| − | |||
| − | |||
| − | |||
| − | |||
| − | |||
| − | |||
| − | |||
| − | |||
| − | == | + | == Weather == |
{| | {| | ||
| Zeile 419: | Zeile 406: | ||
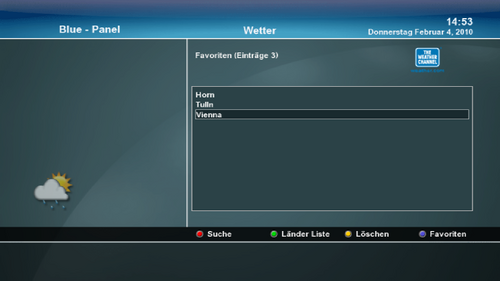
| − | + | Add a city: | |
{| | {| | ||
|-class="hintergrundfarbe5" | |-class="hintergrundfarbe5" | ||
| Zeile 427: | Zeile 414: | ||
|- | |- | ||
|} | |} | ||
| − | + | ||
== RSS Reader == | == RSS Reader == | ||
| Zeile 438: | Zeile 425: | ||
|} | |} | ||
| − | + | The settings for the RSS Reader can be changed int the '''[[Favo RSS.xml|/etc/Favo RSS.xml]]''' with a text editor. | |
| − | == eMail | + | == eMail Checker == |
{| | {| | ||
| Zeile 451: | Zeile 438: | ||
|- | |- | ||
| | | | ||
| − | [[Bild:E2_Email_erstelle_konto.png|left|thumb|500px| | + | [[Bild:E2_Email_erstelle_konto.png|left|thumb|500px|Account settings]] |
|- | |- | ||
|} | |} | ||
| Zeile 462: | Zeile 449: | ||
|[[Bild:E2_eTorrent_menue.png|left|thumb|500px|]] || [[Bild:E2_eTorrent_einstellung.png|left|thumb|500px|]] | |[[Bild:E2_eTorrent_menue.png|left|thumb|500px|]] || [[Bild:E2_eTorrent_einstellung.png|left|thumb|500px|]] | ||
|-valign="top" | |-valign="top" | ||
| − | | [[Bild:etorrent-auswahl-enigma2-gemini.png|left|thumb|350px| | + | | [[Bild:etorrent-auswahl-enigma2-gemini.png|left|thumb|350px|with the yellow button you can add a Torrent]] |
|} | |} | ||
| − | + | == Webcam Viewer == | |
| − | |||
| − | |||
| − | |||
| − | |||
| − | |||
| − | |||
| − | == Webcam | ||
{| | {| | ||
| Zeile 481: | Zeile 461: | ||
|} | |} | ||
| − | == | + | == Calendar == |
{| | {| | ||
|-class="hintergrundfarbe5" | |-class="hintergrundfarbe5" | ||
|-valign="center" | |-valign="center" | ||
| − | |[[Bild:Kalender-Enigma2.png|left|thumb|500px| | + | |[[Bild:Kalender-Enigma2.png|left|thumb|500px|The Gemini calendar. On the left the appointments of the month, on the right the overview of the month.]]||[[Bild:Kalender-Enigma2-einstellungen.png|left|thumb|500px|The settings of the Gemini calendars.]] |
|} | |} | ||
| − | == | + | == Alarm clock == |
{| | {| | ||
| Zeile 499: | Zeile 479: | ||
== EPG Refresh == | == EPG Refresh == | ||
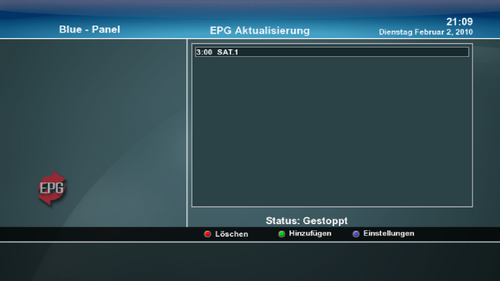
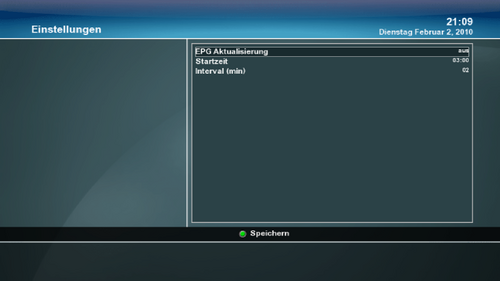
| − | EPG Refresh | + | For updating the EPG on a daily base EPG Refresh zapps during the night on the channels specified by the user (one channel of a group is required - e.g. RTL loads the EPG of the complete RTL group) |
| − | + | This way you will have allways an updates EPG without zapping manually. | |
{| | {| | ||
|-class="hintergrundfarbe5" | |-class="hintergrundfarbe5" | ||
|-valign="center" | |-valign="center" | ||
| − | |[[Bild:E2_epgRefresh.png|left|thumb|500px| | + | |[[Bild:E2_epgRefresh.png|left|thumb|500px|Empty EPG Refresh list without active channels.]] |
|- | |- | ||
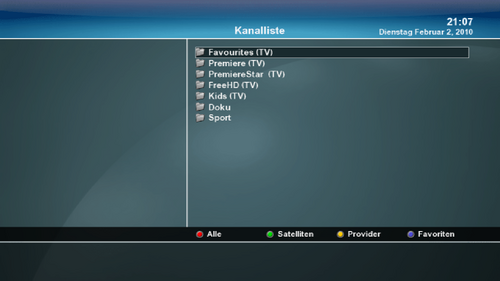
| − | | [[Bild:E2_epgRefresh_add.png|left|thumb|500px| | + | | [[Bild:E2_epgRefresh_add.png|left|thumb|500px|The Bouquet/Channel/Provider/Sat list from where you can select channels.]] |
|- | |- | ||
| − | | [[Bild:E2_epgRefresh_add2.png|left|thumb|500px|EPG | + | | [[Bild:E2_epgRefresh_add2.png|left|thumb|500px|Update EPG for SAT1 at 3:00 configured.]] |
|- | |- | ||
| − | | [[Bild:E2_epgRefresh_einstellung.png|left|thumb|500px| | + | | [[Bild:E2_epgRefresh_einstellung.png|left|thumb|500px|Here you can change every update setting for each channel.]] |
|- | |- | ||
|} | |} | ||
| − | == EPG | + | == EPG Search == |
{| | {| | ||
| Zeile 523: | Zeile 503: | ||
|} | |} | ||
| − | == | + | == Daemons == |
{| | {| | ||
|-class="hintergrundfarbe5" | |-class="hintergrundfarbe5" | ||
|-valign="center" | |-valign="center" | ||
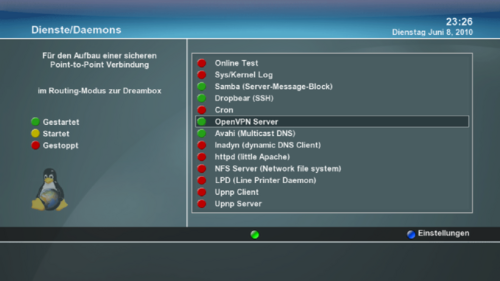
| − | |[[Bild:E2_Dienste.png|left|thumb|500px| | + | |[[Bild:E2_Dienste.png|left|thumb|500px|The service/daemon can be started/stopped with the OK button<br/> '''green''' - daemon started, '''red''' - daemon stopped, blue - settings of the service.]]|| |
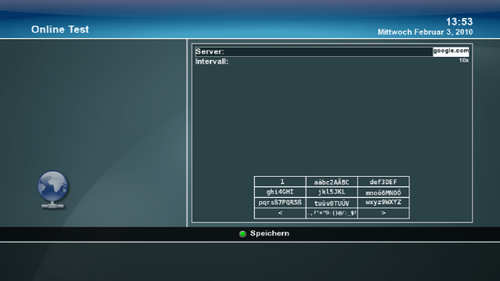
| − | *'''[[Blue | + | *'''[[GP2 Blue Panel (en)#Online Test|Online Test]]''' - Checks if the Dreambox is connected to the internet |
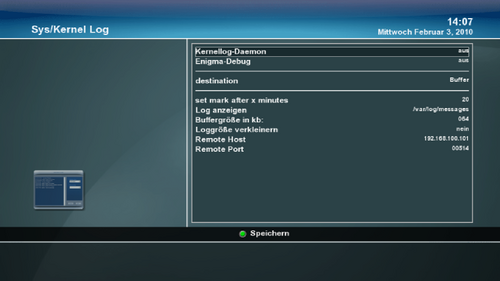
| − | *'''[[Blue | + | *'''[[GP2 Blue Panel (en)#Sys/Kernel Log|Sys/Kernel Log]]''' - creates a system and/or kernel - log (error messages)<br/> |
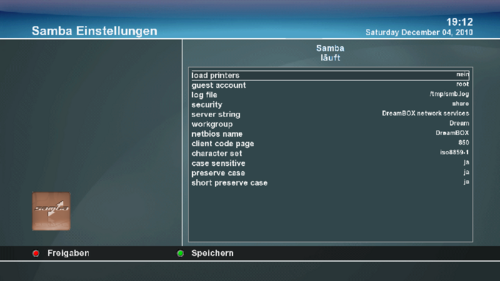
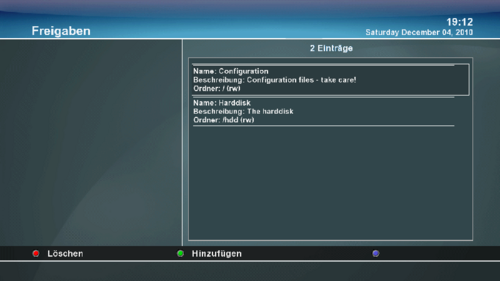
| − | *'''[[Blue | + | *'''[[GP2 Blue Panel (en)#Samba Server|Samba Server]]''' - green after activating the samba server |
| − | *'''[[Blue | + | *'''[[GP2 Blue Panel (en)#Dropbear (SSH)|Dropbear (SSH)]]''' - SSH (SecureShell) daemon of the Dreambox |
| − | *'''[[Blue | + | *'''[[GP2 Blue Panel (en)#Cron|Cron]]''' - Timed processes (Crontables) |
| − | *'''[[Blue | + | *'''[[GP2 Blue Panel (en)#OpenVPN|OpenVPN]]''' - Openvpn |
| − | *'''[[Blue | + | *'''[[GP2 Blue Panel (en)#Avahi (Zeroconf)|Avahi (Zeroconf)]]''' - connecting devices in the network |
| − | *'''[[Blue | + | *'''[[GP2 Blue Panel (en)#InaDyn|InaDyn]]''' - for converting a dynamic IP adress in a subDomain |
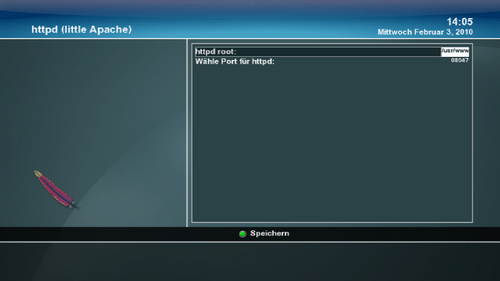
| − | *'''[[Blue | + | *'''[[GP2 Blue Panel (en)#Little Apache|httpd (little Apache)]]''' - a small "Webserver" with limited functions |
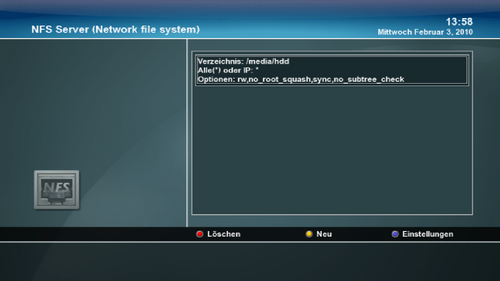
| − | *'''[[Blue | + | *'''[[GP2 Blue Panel (en)#NFS-Server|NFS Server (Network File System)]]''' - Linux "file sharing" |
| − | *'''[[Blue | + | *'''[[GP2 Blue Panel (en)#Printer (LPD)|LPD (Line Printer Daemon)]]''' - Linux "print server" |
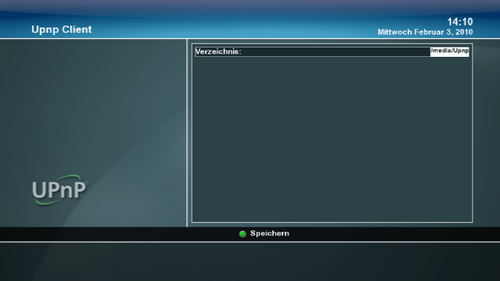
| − | *'''[[Blue | + | *'''[[GP2 Blue Panel (en)#UPnP Client|UPnP Client]]''' - Universal Plug and Play Client |
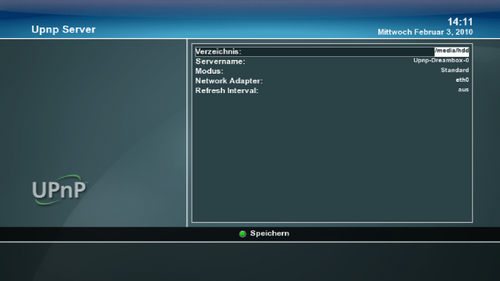
| − | *'''[[Blue | + | *'''[[GP2 Blue Panel (en)#UPnP Server|UPnP Server]]''' - Universal Plug and Play Server |
| − | *'''[[Blue | + | *'''[[GP2 Blue Panel (en)#TPMD (Genuine Dreambox)|TPMD Genuine Dreambox]]''' - authenticity testing of the Dreambox |
| | | | ||
|- | |- | ||
| Zeile 565: | Zeile 545: | ||
|-class="hintergrundfarbe5" | |-class="hintergrundfarbe5" | ||
|-valign="top" | |-valign="top" | ||
| − | |[[Bild:Online-Test-Enigma2.png|left|thumb|500px| | + | |[[Bild:Online-Test-Enigma2.png|left|thumb|500px|The Online test checks if the Box is connected to the internet.<br/> The online notification is in theinfobar.]] |
|- | |- | ||
|} | |} | ||
| Zeile 584: | Zeile 564: | ||
|[[Bild:Extras-SambaServer-Enigma2.png|left|thumb|500px|]] | |[[Bild:Extras-SambaServer-Enigma2.png|left|thumb|500px|]] | ||
|- | |- | ||
| − | |[[Bild:Extras-SambaServer-Freigaben-Enigma2.png|left|thumb|500px|]]|| | + | |[[Bild:Extras-SambaServer-Freigaben-Enigma2.png|left|thumb|500px|]]|| The configuration can also be made in /etc/samba/smb.conf <br>For more informations coincerning the settings: [[Samba Server (en)|look here]]. |
|- | |- | ||
|} | |} | ||
| Zeile 590: | Zeile 570: | ||
== Dropbear (SSH) == | == Dropbear (SSH) == | ||
| − | + | Following Wiki articles explain the functions and the possibilities of Dropbear. | |
* [[Dropbear]] | * [[Dropbear]] | ||
| Zeile 602: | Zeile 582: | ||
|-class="hintergrundfarbe5" | |-class="hintergrundfarbe5" | ||
|-valign="top" | |-valign="top" | ||
| − | |[[Bild:Extras-Cron-Enigma2.png|left|thumb|500px| | + | |[[Bild:Extras-Cron-Enigma2.png|left|thumb|500px|The Cron Daemon executes user scripts at defined times]] |
|- | |- | ||
|} | |} | ||
| Zeile 611: | Zeile 591: | ||
|-class="hintergrundfarbe5" | |-class="hintergrundfarbe5" | ||
|-valign="top" | |-valign="top" | ||
| − | |[[Bild:Extras-openvpn.png|left|thumb|500px|der Openvpn Server]]|| | + | |[[Bild:Extras-openvpn.png|left|thumb|500px|der Openvpn Server]]||available since Gemini 5.1 |
|- | |- | ||
| − | |[[Bild:Extras-openvpn1.png|left|thumb|500px]]|| | + | |[[Bild:Extras-openvpn1.png|left|thumb|500px]]||here you can configure an Openvpn Server easily, both IP´s are thunnel adresses, which should be in a different range. |
|- | |- | ||
| − | |[[Bild:Extras-openvpn2.png|left|thumb|500px]]|| | + | |[[Bild:Extras-openvpn2.png|left|thumb|500px]]||with save a keyfile is stored in /etc/openvpn (*.key), the server config (*.conf) and the Windows Clientconfig (*.ovpn) |
| − | .key | + | .key and .ovpn need to be copied in the config map of Openvpn for Windows - in the .ovpn you need to add the IP/DynDNS adress which points to the Dreambox (connected to the router). |
| − | + | After the successful start of the VPN thunnel (green symbol in the Windows infobar) the Dreambox should be reachable on the thunnel adress of the server. | |
|- | |- | ||
|} | |} | ||
| − | + | of course you can also use a connection with certificates - therefore you need to edit the config files manually | |
== Avahi (Zeroconf) == | == Avahi (Zeroconf) == | ||
| Zeile 629: | Zeile 609: | ||
|-class="hintergrundfarbe5" | |-class="hintergrundfarbe5" | ||
|-valign="top" | |-valign="top" | ||
| − | |Avahi | + | |Avahi is a free implementation of Zeroconf, a technology to connect devices in a local network, without manual configuration |
| − | '''[http:// | + | '''[http://en.wikipedia.org/wiki/Avahi_%28software%29 Avahi in Wikipedia]''' |
|- | |- | ||
|} | |} | ||
| Zeile 640: | Zeile 620: | ||
|-class="hintergrundfarbe5" | |-class="hintergrundfarbe5" | ||
|-valign="top" | |-valign="top" | ||
| − | |[[Bild:InaDyn-Enigma2.png|left|thumb|500px| | + | |[[Bild:InaDyn-Enigma2.png|left|thumb|500px|Here it is possible to update a DynDNS service, if this is not possible in the router]] |
|- | |- | ||
|} | |} | ||
| Zeile 649: | Zeile 629: | ||
|-class="hintergrundfarbe5" | |-class="hintergrundfarbe5" | ||
|-valign="top" | |-valign="top" | ||
| − | |[[Bild:LittleApache-Enigma2.png|left|thumb|500px| | + | |[[Bild:LittleApache-Enigma2.png|left|thumb|500px|A lightweight Webserver (Busybox httpd)]] |
|- | |- | ||
|} | |} | ||
| Zeile 662: | Zeile 642: | ||
|} | |} | ||
| − | == | + | == Printer (LPD) == |
| − | + | If the correct '''[[GP2 Blue Panel#Kernel Module|KernelModul]]''' is loaded and an USB printer is connected you can see the print serverwird status - green = active. | |
| − | ''' | + | '''Manual''' to configure the Dreambox as [[Druckserver]]. |
== UPnP Client == | == UPnP Client == | ||
| Zeile 686: | Zeile 666: | ||
|} | |} | ||
| − | + | See also: [[Stream auf PS3]] | |
== TPMD (Genuine Dreambox) == | == TPMD (Genuine Dreambox) == | ||
| Zeile 693: | Zeile 673: | ||
|-class="hintergrundfarbe5" | |-class="hintergrundfarbe5" | ||
|-valign="top" | |-valign="top" | ||
| − | | | + | |This service enables the "authentication" to check if your Dreambox is an "original". With the Genuine Plugin in the Pluginbrowser you can perform the check. |
|- | |- | ||
|} | |} | ||
| − | == | + | == Device Manager == |
{| | {| | ||
| Zeile 704: | Zeile 684: | ||
| [[Bild:Geraete-Einstellungen-Enigma2.png|left|thumb|500px|]] || | | [[Bild:Geraete-Einstellungen-Enigma2.png|left|thumb|500px|]] || | ||
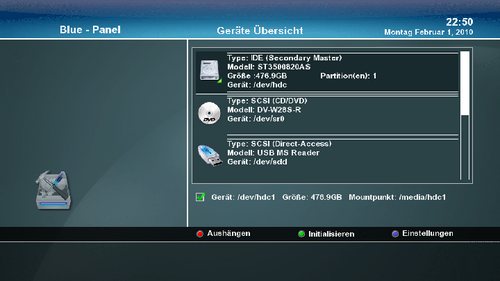
| − | *''' | + | *'''Unmount''' - With the red button you can unmount the device from the system |
| − | *'''[[Blue | + | *'''[[GP2 Blue Panel (en)#Initialise (Format)|Initialise]]''' - Format the hard disk with the green button ('''ATTENTION''' ALL DATA WILL BE ERASED!!) |
| − | *'''[[Blue | + | *'''[[GP2 Blue Panel (en)#Settings/Parameters|Settings]]''' - are opened with the blue button |
| − | *'''[[Blue | + | *'''[[GP2 Blue Panel (en)#Informations|Informations]]''' - The device informations are opened with the OK button |
| | | | ||
|} | |} | ||
| − | == | + | == Informations == |
{| | {| | ||
| Zeile 721: | Zeile 701: | ||
|[[Bild:Geraete-INFO-Enigma2.png|left|thumb|500px|]] || | |[[Bild:Geraete-INFO-Enigma2.png|left|thumb|500px|]] || | ||
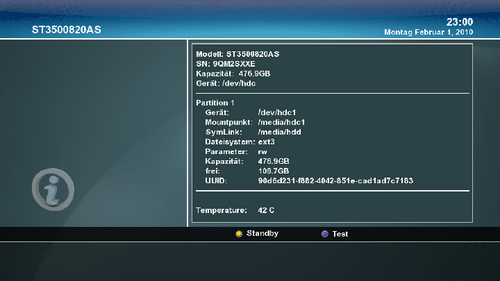
| − | *'''Standby''' - | + | *'''Standby''' - Switches the HDD in standby immediately |
| − | * '''[[Blue | + | * '''[[GP2 Blue Panel (en)#Test menu|Test]]''' - are opened with the blue button |
| − | *'''[[Blue | + | *'''[[GP2 Blue Panel (en)#HDD Temperature|HDD Temperature]]''' - can be found here. |
|- | |- | ||
|} | |} | ||
| − | == | + | == Test menu == |
{| | {| | ||
| Zeile 736: | Zeile 716: | ||
|[[Bild:Geraete-test-Enigma2.png|left|thumb|500px|]] || | |[[Bild:Geraete-test-Enigma2.png|left|thumb|500px|]] || | ||
| − | *''' | + | *'''Speed''' - Measure the speed of the HDD/USB Stick |
| − | *''' | + | *'''Check File System''' - Check the file system and fix errors |
|- | |- | ||
|} | |} | ||
| − | == | + | == Settings/Parameters == |
{| | {| | ||
|-class="hintergrundfarbe5" | |-class="hintergrundfarbe5" | ||
|-valign="center" | |-valign="center" | ||
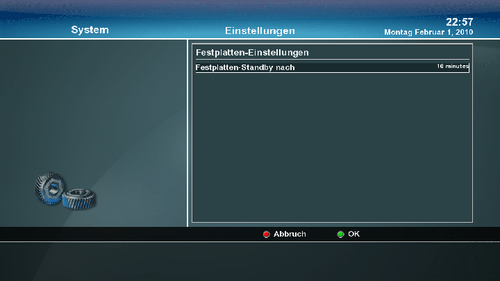
| − | |[[Bild:Geraete-menue-Enigma2.png|left|thumb|500px|]] || ''' | + | |[[Bild:Geraete-menue-Enigma2.png|left|thumb|500px|]] || '''Hard disks:'''<br/>'''Hard Disk Standby after''' - Hard Disk goes into standby after the specified time |
|- | |- | ||
| − | |[[Bild:Geraete-menue-CD-Enigma2.png|left|thumb|500px|]] || '''DVD | + | |[[Bild:Geraete-menue-CD-Enigma2.png|left|thumb|500px|]] || '''DVD player:'''<br/>'''speed''' - the higher the value, the quiter the DVD device plays |
|} | |} | ||
| − | == HDD | + | == HDD Temperature == |
| − | + | If the hard disk is not recognized, read here: [[Hddtemp.db]] | |
| − | == HDD | + | == HDD Speed == |
{| | {| | ||
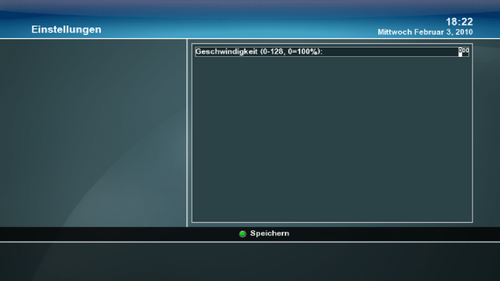
| Zeile 765: | Zeile 745: | ||
|} | |} | ||
| − | == | + | == Initialise (Format) == |
{| | {| | ||
|-class="hintergrundfarbe5" | |-class="hintergrundfarbe5" | ||
|-valign="top" | |-valign="top" | ||
| − | + | Before formating the hard disk needs to be "unmounted". | |
|- | |- | ||
| − | | | + | |Formating the hard dsik will erase all data on the disk! |
|} | |} | ||
| Zeile 781: | Zeile 761: | ||
|-class="hintergrundfarbe5" | |-class="hintergrundfarbe5" | ||
|-valign="center" | |-valign="center" | ||
| − | |[[Bild:E2-DVD-Datei Browser.png|left|thumb|500px| | + | |[[Bild:E2-DVD-Datei Browser.png|left|thumb|500px|The DVD Player can also play DVD Images, which kan be selected here]] Further informations about the DVD Player and the operation can be found here: [[DVD Player]] |
|- | |- | ||
|} | |} | ||
| Zeile 789: | Zeile 769: | ||
{| |-class="hintergrundfarbe5" | {| |-class="hintergrundfarbe5" | ||
|-valign="center" | |-valign="center" | ||
| − | |[[Bild:Rezapp-Enigma2.png|left|thumb|500px|]] || | + | |[[Bild:Rezapp-Enigma2.png|left|thumb|500px|]] ||Here in this example after 5 minutes the box zapps automaticcally back to the channel '''RTL2'''. You can zapp as much as you want, after the set time the box zapps back to the channel. |
|- | |- | ||
|} | |} | ||
| − | [[Kategorie:GP2]] | + | [[Kategorie:GP2 (en)]] |
Aktuelle Version vom 28. Januar 2016, 22:36 Uhr
In this article you will find links for extended descriptions of the GP2 Blue Panel desktop. The successor of this Blue Panel is the GP3 Blue Panel desktop.
GP2 Blue Panel Desktop (Basis Gemini 5.x)
| |
Camd Selection-Activation
| The cursor is on the menu entry:
Select Camd with the ← → buttons.
Here you can select the installed Cams. With the green button the selected Cam is started or restarted (Camreset). |
Auto-Cam activate / settings
Autocam is used when different channels are using different Cams. The Cams will be started/stopped automatically.| With the yellow button you can activate the Autocam function. This works only when more as one Softcam was installed! |
| After activating the Autocam function with the yellow button of the remote control the menu appears. We continu with the Autocam settings. |
| Here it is possible to assign a specific SoftCam for a channel. If you want to add a new channel press the green button. Now it is possible to navigate through the different lists (provider/satellites) with the colored buttons. Press OK to add the selected channel. |
| Now you can: select a channel in the favoriten list with the colored buttons you can select satellites or providers to choose a channel. |
| Here you select the wanted channels, satellites or provider and assing a Softcam. with the blue button you can delete an entry. |
Settings
|
Infobar
|
General
|
EPG Setup
|
Install/Remove addons
|
Download (Gemini Server)
| A part of the list offered by the Gemini Server. |
Download (My Server)
Here you have access to an extra server, if you have configured the server yourself.
This is an interface for users who want to install other Addons as offered by the Gemini Server over the BluePanel.
Therefore you need to configure the useraddon.xml to connect toy your own server. The useraddon.xml can be found in /etc.
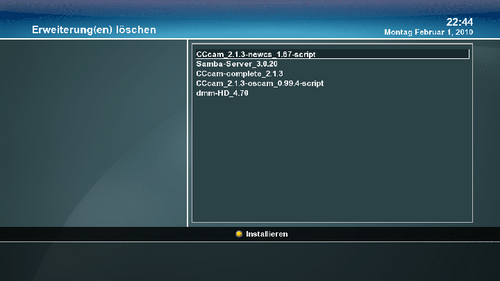
Remove
| Think twice before removing, once removed it is gone... |
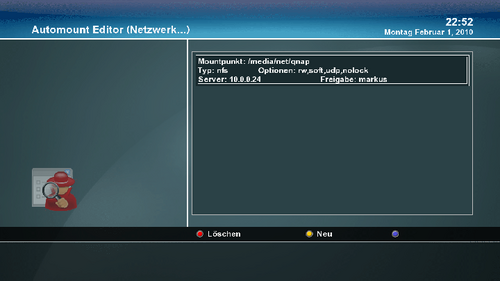
Automount Editor (Network...)
| this is how it looks if an entry exists in the /etc/auto.network. |
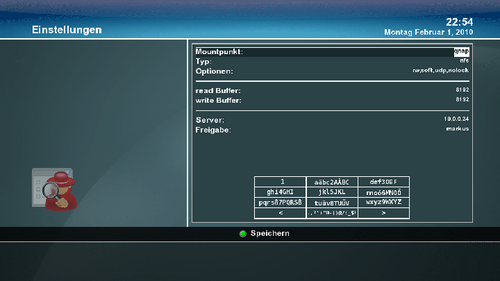
| With the editor it is possible to add an entry with the remote control in the /etc/auto.network, or to edit. But it's easier to edit the "auto.network" directly in "/etc" with an editor. |
Create satellites.xml
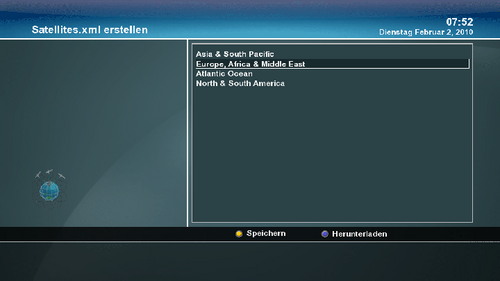
| Here you can select the desired satellite region, for creating you new satellites.xml. |
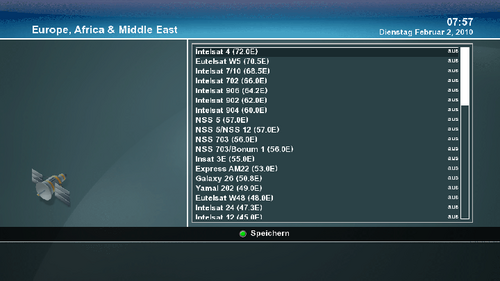
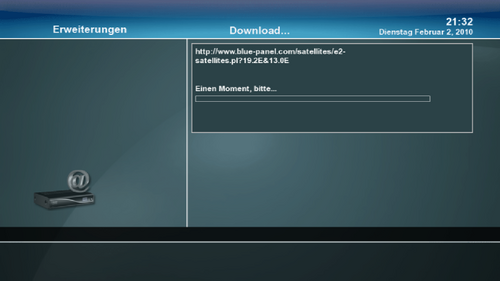
| Here you can select the desired satellitsn you can receive. With the cursor right/left you can switch the selection. Once the seledction is made and saved with the green button, the menu for downloading appears (next image) |
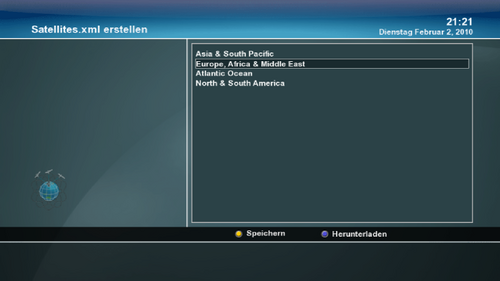
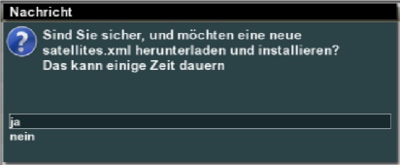
| Here you can start the download over the blue button |
Password
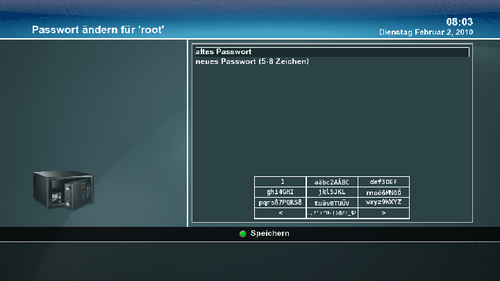
| Here you can change the password for the superuser "root". It's also possible to change the password over telnet: Change Password (en) |
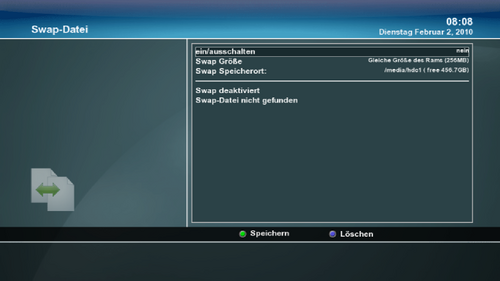
Swap file
Quickbutton
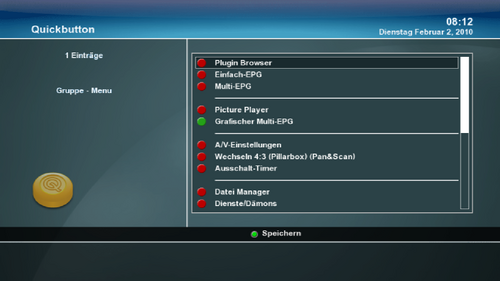
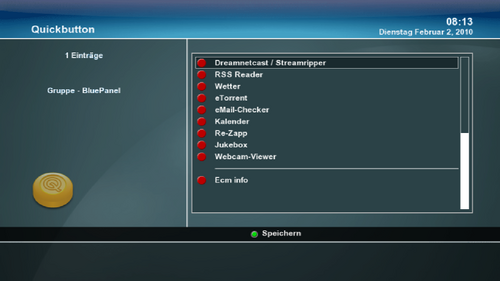
The Quickbutton is the green button on the remote control (in TV Mode). Standard only the Pluginbrowser is activated, you can add additional applications. If you have added applications a selection menu appears when pressing the green button.
Informations how to add telnet commands or scripts can be found here: Quickbutton.xml
File Browser
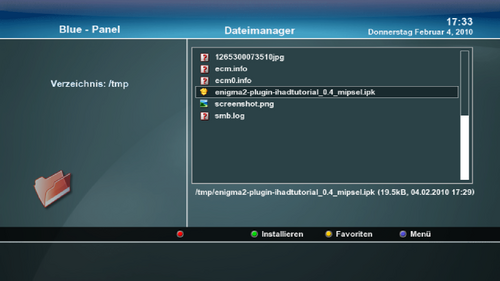
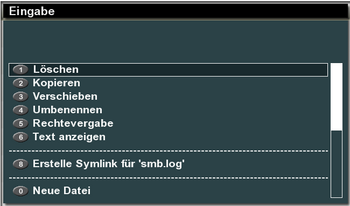
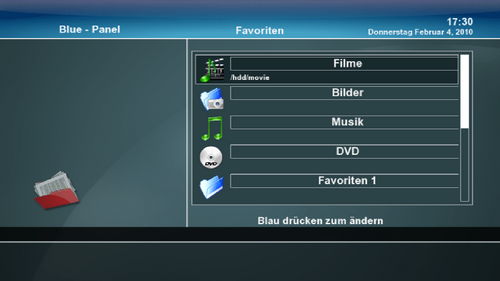
The File Browser is on of the most powerfull tools in Gemini. With this file browser you can navigate through the image, but it will also play media files , show text files and you can install manually all kind of Addons. And of course you can delete, rename ... files.
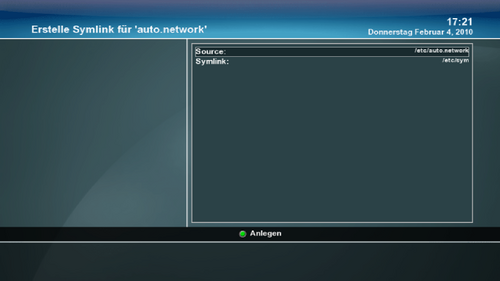 Create a Symlink | |
Gemini Extras
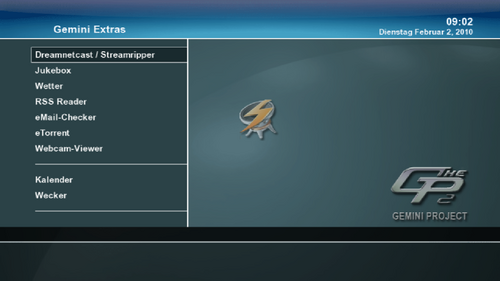
The control central for most of the Gemini Addons, which are integrated in the Gemini Image.
| |
|
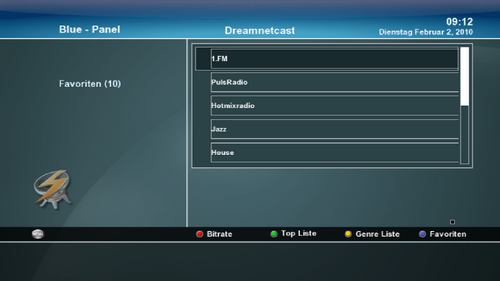
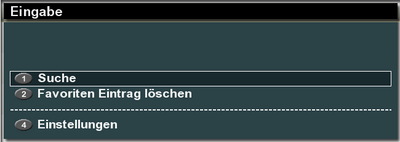
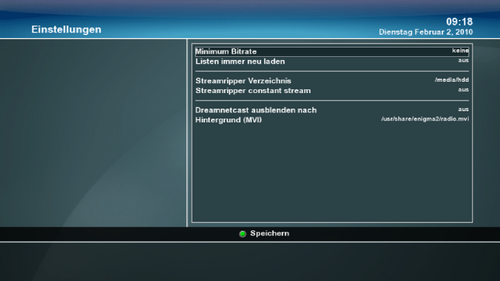
Dreamnetcast / Streamripper
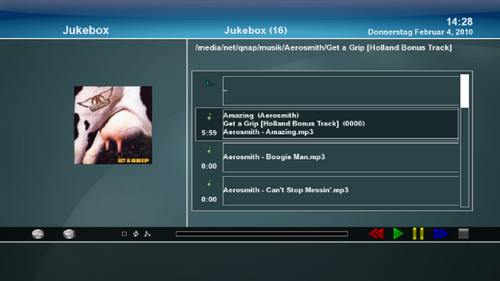
Jukebox
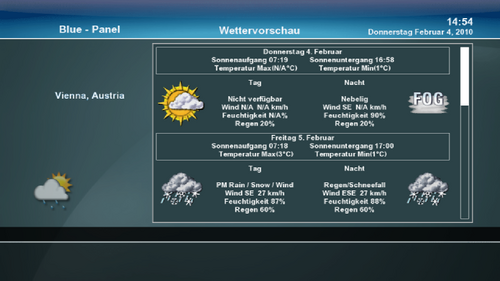
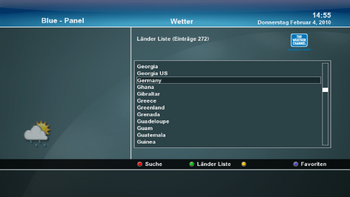
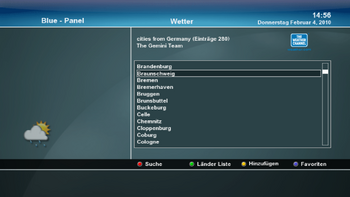
Weather
Add a city:
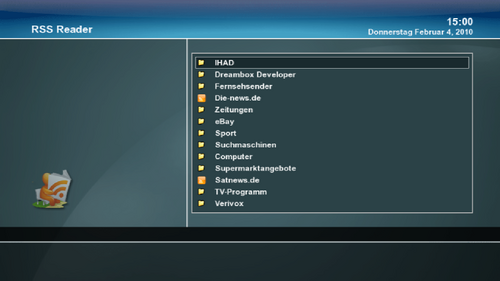
RSS Reader
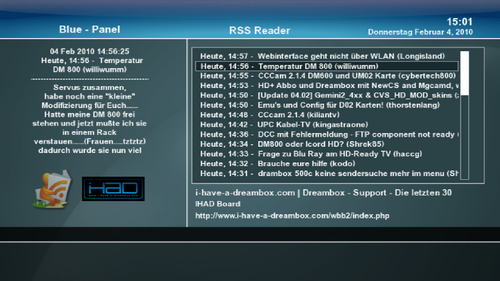
The settings for the RSS Reader can be changed int the /etc/Favo RSS.xml with a text editor.
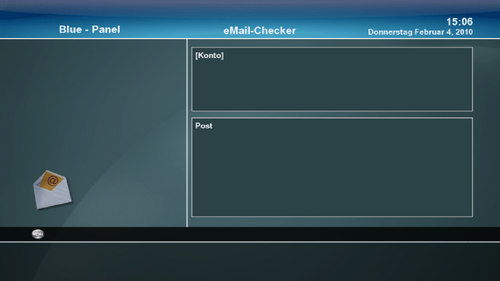
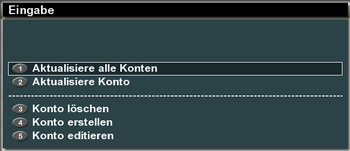
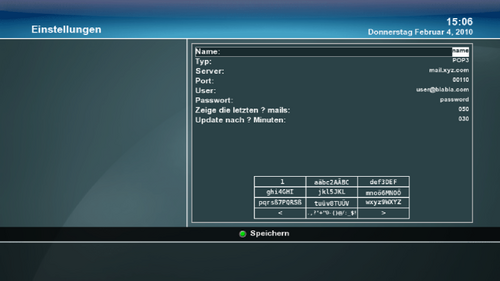
eMail Checker
eTorrent
Webcam Viewer
Calendar
Alarm clock
EPG Refresh
For updating the EPG on a daily base EPG Refresh zapps during the night on the channels specified by the user (one channel of a group is required - e.g. RTL loads the EPG of the complete RTL group) This way you will have allways an updates EPG without zapping manually.
EPG Search
Daemons
|
Online Test
Sys/Kernel Log
Samba Server
| The configuration can also be made in /etc/samba/smb.conf For more informations coincerning the settings: look here. |
Dropbear (SSH)
Following Wiki articles explain the functions and the possibilities of Dropbear.
Cron
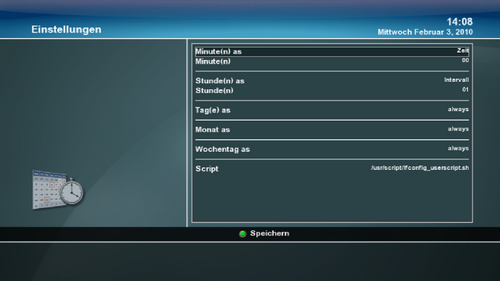
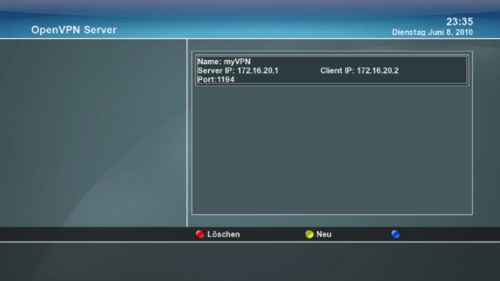
OpenVPN
| available since Gemini 5.1 | |
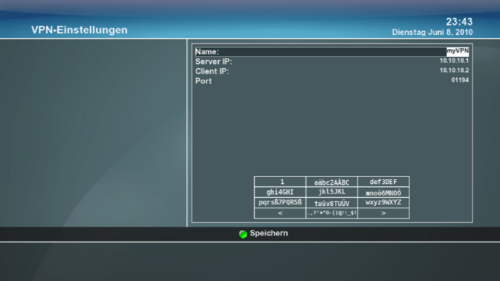
| here you can configure an Openvpn Server easily, both IP´s are thunnel adresses, which should be in a different range. | |
| with save a keyfile is stored in /etc/openvpn (*.key), the server config (*.conf) and the Windows Clientconfig (*.ovpn)
.key and .ovpn need to be copied in the config map of Openvpn for Windows - in the .ovpn you need to add the IP/DynDNS adress which points to the Dreambox (connected to the router). After the successful start of the VPN thunnel (green symbol in the Windows infobar) the Dreambox should be reachable on the thunnel adress of the server. |
of course you can also use a connection with certificates - therefore you need to edit the config files manually
Avahi (Zeroconf)
| Avahi is a free implementation of Zeroconf, a technology to connect devices in a local network, without manual configuration |
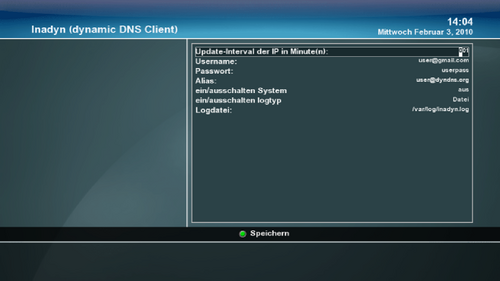
InaDyn (dynamic DNS Client)
httpd (Little Apache)
NFS-Server
Printer (LPD)
If the correct KernelModul is loaded and an USB printer is connected you can see the print serverwird status - green = active.
Manual to configure the Dreambox as Druckserver.
UPnP Client
UPnP Server
See also: Stream auf PS3
TPMD (Genuine Dreambox)
| This service enables the "authentication" to check if your Dreambox is an "original". With the Genuine Plugin in the Pluginbrowser you can perform the check. |
Device Manager
|
Informations
|
|
Settings/Parameters
| Hard disks: Hard Disk Standby after - Hard Disk goes into standby after the specified time | |
| DVD player: speed - the higher the value, the quiter the DVD device plays |
HDD Temperature
If the hard disk is not recognized, read here: Hddtemp.db
HDD Speed
Initialise (Format)
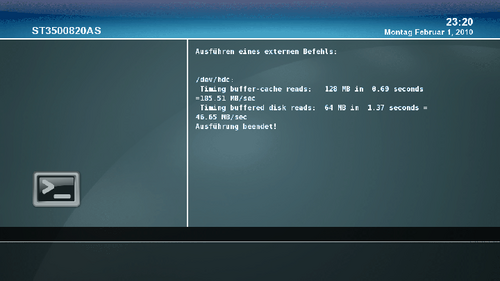
Before formating the hard disk needs to be "unmounted".| Formating the hard dsik will erase all data on the disk! |
DVD Player
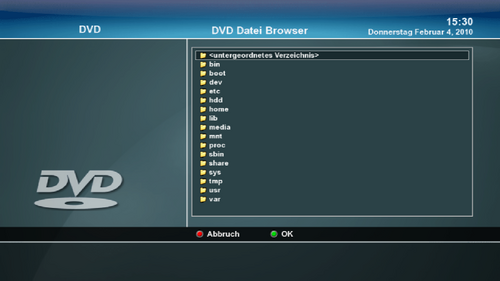
| Further informations about the DVD Player and the operation can be found here: DVD Player |
ReZapp
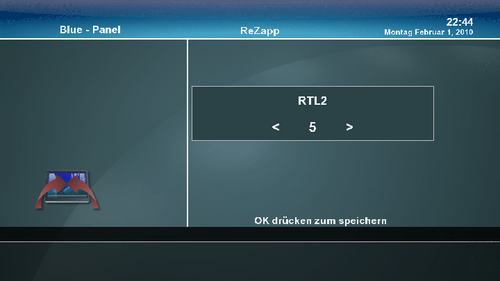
| Here in this example after 5 minutes the box zapps automaticcally back to the channel RTL2. You can zapp as much as you want, after the set time the box zapps back to the channel. |
